

Requirement Analysis, infinite scroll Challenge, On-device inference
Sunday Newsletter

Welcome to the first issue of my notes.
My goal is to share my raw, in-the-trenches notes as a Head of Engineering. Each week, you’ll get one high-level insight from my “Work Journal” (on leadership, product, and strategy) and one deep-dive from my “Lab Notebook” (on code, tools, and architecture).
My hope is that this helps you navigate your own career, whether you’re moving from Senior to Staff or from Lead to Manager.
A Quick Thought on Requirements
I was reminded this week of a simple truth: Incomplete and vaguely worded requirements are the major source of reworks, endless alignment meetings, and potential bugs.
Even though it takes time and is difficult to complete the requirement analysis, that upfront work will save you (and your team) days of future frustration
Your Interview “No-Hustle” Tip
Your interviewer is not just evaluating your coding ability; they are simulating what it’s like to work with you on a difficult problem.
Narrate your thought process, especially when you are stuck or unsure.
Before You Code : Don’t just dive in. Spend 30 seconds narrating your plan. Say, “Okay, I see the problem. It looks like I need to fetch data and then handle filtering. I’ll start by scaffolding the data-fetching logic. I’m assuming the API is paginated, so I’ll need to account for that. Is that a correct assumption?”
This proves you can handle ambiguity and make trade-offs.
When You Get Stuck : Do not go silent. This is the most critical moment. Narrate your debugging. Say, “This is failing. I expected this function to return an array, but it’s returning
null. Let me trace back... Ah, I see. I made a mistake in theifcondition. The root cause is here. I’ll fix that.”This proves you are a stable, logical operator who can recover from failure.
Your goal isn’t to be perfect. Your goal is to be a great collaborator. A perfect coder who goes silent is a worse teammate than a good coder who communicates clearly.
I created first weekly challenge based on Reactjs (Web Development).
Challenge 1: The “Infinite Scroll” Image Gallery
This challenges your understanding of the DOM, Refs, and efficient list rendering.
The Task: Build a photo gallery that fetches data from a public API (like Unsplash or Lorem Picsum) and loads more items as the user scrolls to the bottom.
Key Concepts:
useEffect,useRef,IntersectionObserver API, and cleanup functions.The “Intermediate” Twist:
Implement a virtualized list (windowing) manually or using a library to ensure the DOM doesn’t crash when 1,000 items are loaded.
Preserve scroll position: If the user clicks an image to view details and hits “Back”, they should return to the exact same scroll position.
I will upload these challenges to my website
I Tried to Run an LLM on My Phone
We’ve all seen the “magic” of on-device AI. It’s the key to apps that are blazing fast, work offline, and actually respect user privacy (since the data never leaves the phone).
But there’s a huge gap between knowing this and doing this.
The core problem is simple: “How do I make a large, slow, power-hungry model small, fast, and efficient enough to run on a user’s phone without killing their battery?”
I decided to find out by embedding a text-gen model (Google’s Gemma) into a Kotlin app. I thought I’d spend all my time in Python converting models. But I was wrong.
Here’s the story of what I learned, and the “Aha!” moment that lets you skip 90% of the work.
The Plan vs. The Reality
My plan seemed simple:
Choose a model (Gemma 2B, open-source and good for on-device).
Set up my Python environment (
pip install tensorflow keras-nlp).Download the model.
Convert it to a small TFLite file.
Build the app.
This plan failed at step 3.
“Aha!” Moment #1: The Hugging Face “Vanishing” Files
I ran the CLI command to get the model: hf download google/gemma-2b-it-tflite
It took 15 minutes. And then... nothing. The files weren’t in my project folder.
After some digging, I found the “Aha!” moment: The hf CLI saves files to a global cache, not your local directory.
Pro-Tip: If you want files in your project, you must use the --local-dir flag: hf download google/gemma-2b-it-tflite --local-dir ./models/
But this led to the real problem. The model was over 1GB. Even a “tiny” Gemma model I found was 150MB. This is still way too big for an app, and I hadn’t even started the hard part: figuring out the tokenizer, the inference loop, and the conversion process.
This is the part where most of us would quit.
“Aha!” Moment #2: The Magic .task File
I was stuck. I didn’t want to become a full-time model conversion engineer. I just wanted to build an app.
And that’s when I found the real secret: The MediaPipe LlmInference API.
Here’s the entire “Aha!” moment: You don’t need to manually manage the tokenizer, the TFLite conversion, and the text generation. The MediaPipe library does it all.
But it needs a special kind of file. You don’t use the raw Hugging Face model. You need a pre-converted .task file.
I found this model: litert-community/gemma-3-270m-it
The file gemma3-270m-it-q8.task (304 MB) is a special bundle that already contains everything:
The quantized TFLite model
The tokenizer
All the necessary configuration
This means you get to skip the entire Python conversion and quantization nightmare. You just download this one file.
The “Last Mile”: Building the App
This one file changed everything. The problem was no longer “How do I convert a model?” It was “How do I get this 304MB file into my app?”
It’s still too large for the app’s built-in assets folder. The solution? Push it to the device’s local storage manually using adb.
Connect your phone (with USB debugging on).
Run these commands to create a folder and push the file:
# Create the directory on your phone
adb shell “mkdir -p /data/local/tmp/llm”
# Push the .task file
adb push /path/to/your/gemma3-270m-it-q8.task /data/local/tmp/llm/
Now, in your Kotlin Compose app, just add the dependency:
// build.gradle.kts
implementation(”com.google.mediapipe:tasks-genai:0.10.11”)
And give your app permission to read it:
<!-- AndroidManifest.xml --><uses-permission android:name=”android.permission.READ_EXTERNAL_STORAGE”android:maxSdkVersion=”32” />
And that’s it. My app can now find and access the model file. The hardest part of the journey was over.
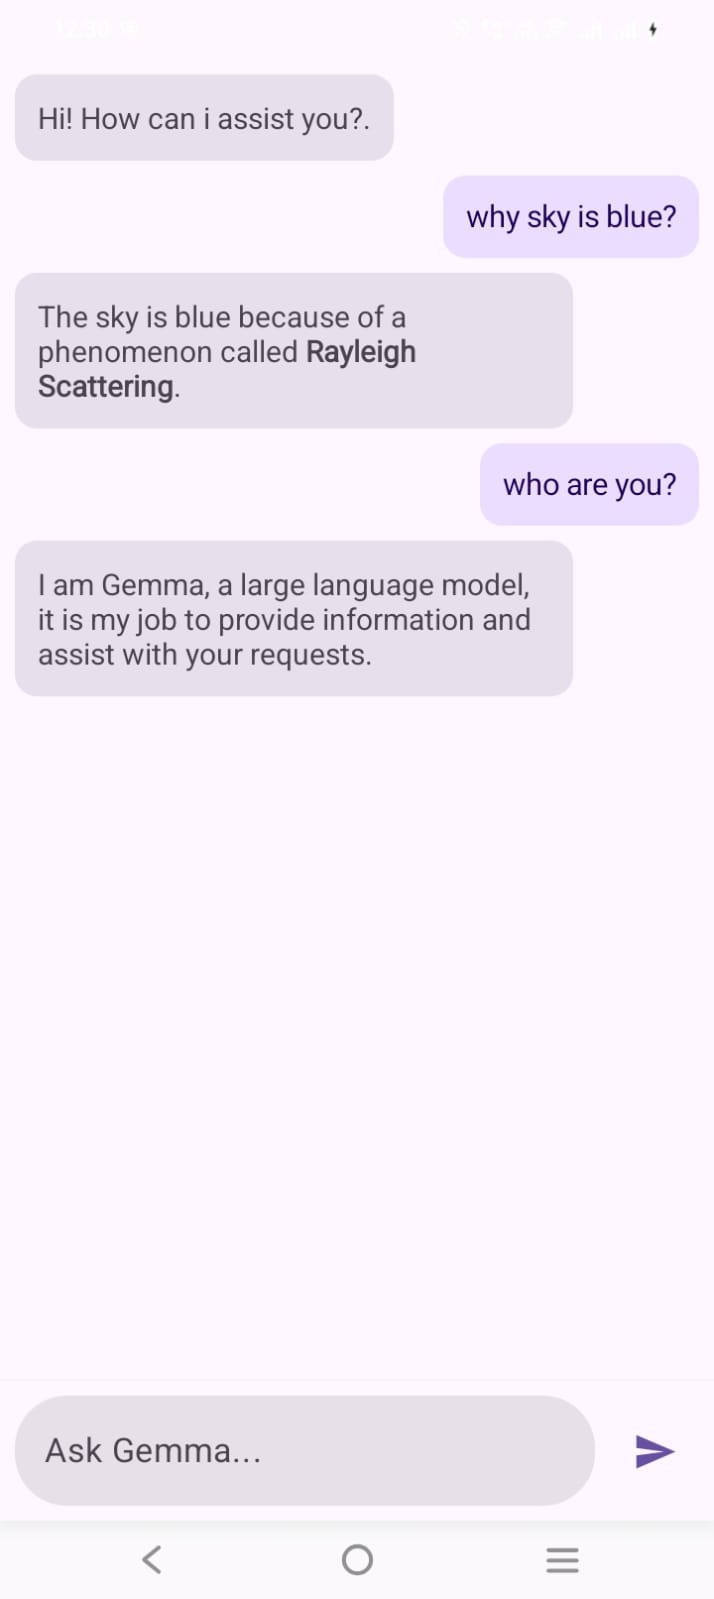
After some tweaking of UI layout and overlapping issue, this is the final Screenshot
My Key Takeaways:
Stop! Don’t convert. Your first step shouldn’t be
pip install. It should be finding a pre-converted.taskfile for MediaPipe.The
.taskfile is the real “shortcut.” It bundles the model, tokenizer, and config, skipping the hardest part of on-device AI.adb pushis your best friend. For any model over ~100MB, don’t bother with app assets. Just push it directly to device storage for testing.
Next time, I’ll share the Kotlin code to actually initialize the LlmInference client and start chatting with the model.